
 |  |
Volume XLIII, No. 26 | September 9, 2021
Ready, Click, Play! Using Split Screens, Annotations, and Fun Games During Remote Learning Sessions
“On your marks, get set, go!” This phrase is often heard at the beginning of track races, but not during the middle of a semester. But March 2020 reset the clock for everyone, forcing faculty and administrators to convert their classrooms and offices into fully remote sessions in a matter of days. During this process, I made sure to create a remote learning environment in which my students would feel some sense of consistency and stability. We all know this generation of college students loves to multitask, and if their attention is not captured within the first few minutes of a remote session, they will lose interest in what is being taught or presented. For this reason, I implemented split-screen demos, games, and annotations to help my students maintain their focus in class and have fun during these unprecedented times.
Split-Screen Demos
Using split-screen demos allows me to better illustrate writing concepts. For instance, I can share a divided screen with a sample thesis on the left side of the screen, and share another window with a paragraph from that thesis on the right side of that screen. To do this on a PC, I click on the upper right-hand corner of a window (without clicking on “Autosave”) and drag that window to the upper right-hand corner of the screen. I watch for a half-page silhouette to appear, then let go of the window; this automatically resizes that window to be half the size of the entire screen (see fig. 1). If I am on a Mac computer, I click on a round, green button at the top right corner of the open file I want to use. According to the YouTube video, “Mac Basics: How to Use Split View,” by Macmostvideo, a drop-down menu provides users with choices to tile a window to the right or left side of the screen (fig.2). Splitting my screen makes it easy for me to share open windows without wasting time selecting multiple files and websites.
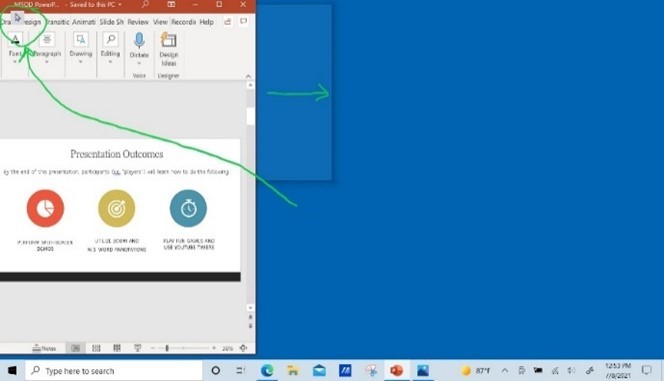 Fig. 1. Screenshot from Windows screen. | 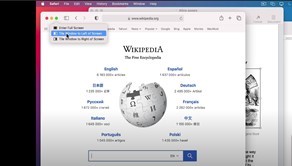 Fig. 2. Screenshot from a Macmostvideo YouTube clip. |
If I am using Windows and I want to add an open file to the other half of the screen, I first click on another open window. Then, I drag that window to the opposite corner of the page until another page silhouette appears (fig. 3). If I am on a Mac, I select an open file and tile it to one side of the screen and the operating system will allow me to click on any other open file and tile it to opposite side of the screen (fig. 4). This strategy is an efficient way teachers and administrators can quickly lay out their screens while on video conferences or apps. It also allows them to use other tools such as annotations when presenting to students or colleagues.
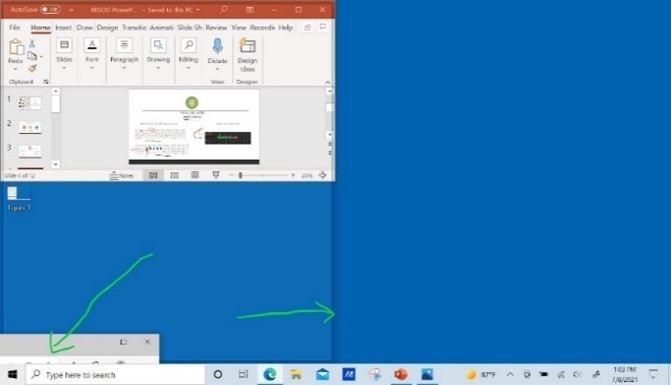 Fig. 3. Screenshot from Windows screen. | 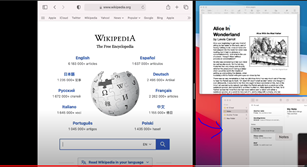 Fig. 4. Screenshot from a Macmostvideo YouTube clip. |
Getting Ready to Annotate
In my remote courses, I use two types of annotations: Microsoft Word annotations and Zoom annotations. Microsoft Word from Office 365 provides a draw tab on its top menu bar. This draw tab, once clicked, provides a horizontal menu of drawing and writing tools. To draw, I select the pen icon, the color choice, and then proceed to draw with a mouse, finger, or computer pen (fig. 5 and 6). I can quickly make annotations on sample writing prompts that can be saved and sent to students later.
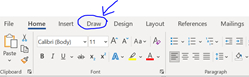 Fig. 5 | 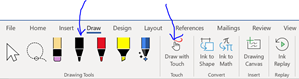 Fig. 6 |
When I annotate via Zoom, I scroll down to the bottom of the meeting screen. At the bottom of the screen, I click on a toolbar icon labeled “Annotate.” There, I can write notes on the screen using my mouse or via touch screen capability. The only disadvantage to using this annotation feature is that if users want to scroll down the web page or file, their annotations will not move along with their scrolling. For this reason, I like to split my screen with a Microsoft Word file opened on the left side of the screen and open a non-Word file or web page on the right side. I can annotate on the left side of the page using the Word draw tools and use Zoom annotations sparingly on the right side of the page. Using these annotations helps my students understand the course content as well as have fun whenever I include annotations along with games.
Interactive Games and YouTube Timers
Students, faculty, and administrators dread having to stare at someone speaking to them for over an hour. For this reason, timers are an important tool because they shift the viewer from being a passive attendant to an active participant in timed activities. There are lots of timers on YouTube, many of which have interesting graphics and catchy music. I use YouTube timers like “Electric- 10 Minute Countdown” from Jack Murphy to help my students stay motivated with visually stunning graphics and rhythmic background music (fig. 7).
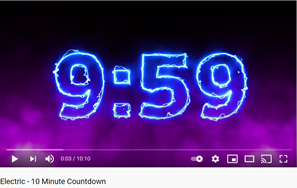
Fig. 7. Screenshot from a Jacky Murphy YouTube clip.
Timers may also help students, staff, and administrators with their time management skills. For instance, I like to use timers to help students create a thesis statement in ten minutes. Then, when the timer stops, I tell students to review their thesis statements. This helps them focus on the writing process one part at a time.
To review concepts or course readings, I use games to help students retain information and start a conversation around the concepts they are learning or texts they are reading.
Playing Classroom Feud
One of the games that I use in my remote classes is called Classroom Feud. Much like the popular TV show Family Feud, the class is divided into two “families.” Because I use Zoom to teach my courses, I put each of the “families” into breakout rooms for ten minutes to review course concepts or readings before the game begins. Then, I choose one student from each group and ask these two students one question regarding the course content or readings. The first student that answers the question correctly will allow the corresponding “family” the opportunity to answer another question. Selected students can answer using the Zoom chat or may unmute their microphones to answer the question. If that “family” gets the answer correct, I award them one point. If they provide an incorrect answer, the opposing “family” will receive the point. Students have 30 seconds to one minute to answer a question. They cannot receive help from their teammates once their names are called to answer a question. When the Classroom Feud is over, I finish the class or begin the next class with a follow-up game to review main ideas and important concepts. This game helps students get motivated and focused on the course readings.
Keys, Cellphone, and Wallet
In this game, students have one minute to gather three physical items that are essential to them: Their keys, their cellphones, and their wallets. I choose a student to start the first round. This student may select one of the three items and type the answer in the Zoom chat or show the class the word written on a sheet of paper via video. Then I ask if someone in the class has the answer to the question related to the selected word. For example, if the word “keys” is chosen by a student from one of the groups, I then ask the class the following question: “What are the key points associated with the course content all of you read or watched?” The first student from another group to answer correctly receives a point for their group. I repeat another round by asking that student to choose a word that is not the word “keys.” If the student from that other group chooses the word “wallet,” then I ask the class the question associated with that word: “What is the most valuable point from the course content you have reviewed?” The first student from another group to answer correctly earns a point for that group. There may be as many rounds as the class time permits. I usually allocate the last twenty minutes of the class session for students to discuss their answers. This review provides them with the ability to see the bigger picture of the course content they are learning.
Student Feedback
Although I have not empirically assessed student attitudes and academic performance as a result of implementing these interactive games and timed activities, anecdotal evidence has provided me with an understanding that implementing these fun activities helps students stay engaged in the course content. Some students tell me that the games are very engaging and help them review the course material in a fun way. Other students tell me the timers have helped them with their time management skills. Some students tell me that the visible timers stressed them out, so instead of using timers on their own, they set alarm clocks to ring every ten or twenty minutes when they are writing different parts of their essays at home. Nearly all my students say that YouTube timers and interactive games help them stop multitasking during my class.
Conclusion
Interactive games, YouTube timers, and digital annotations are classroom strategies that instructors should use in their remote learning lectures. These strategies enhance students’ classroom experiences, making them less likely to multitask during class and better able to understand the material more clearly than if they sat passively staring at their Zoom screens. Likewise, administrators and staff should also incorporate these strategies in their meetings with colleagues. Using a game like Classroom Feud can serve as an ice breaker and help colleagues interact with each other in a more enjoyable way while completing meeting agenda items. These strategies will elevate a teacher’s remote course or employee work meeting to the next level.
Naylet Leon, Assistant Professor, English
For more information, contact the author at Broward College, nleon@broward.edu.
Please review Writing an Innovation Abstracts if you are interested in authoring an Innovation Abstracts for NISOD.
References
“Electric – 10 Minute Countdown.” YouTube, Uploaded by Jack Murphy, 22 Jun. 2018, https://www.youtube.com/watch?v=KAHKP313P2I.
“MacBasics: How to Use Split View.” YouTube, Uploaded by macmostvideo, 25 Nov. 2020, https://www.youtube.com/watch?v=-hUD_XFoO6A.